Nessus Vulnerability Scanning Project

< Implementing Vulnerability Scanning with Nessus >

Installing, configuring, and utilizing Nessus to scan vulnerable machines.

Project Overview

  • The primary goal of the project was to:

    • Install and set up Nessus on an Ubuntu system
    • Perform both basic and credentialed network scans
    • Customize scan policies and configurations
    • Analyze scan results to identify and prioritize vulnerabilities
    • Implement best practices to minimize scan impact on network resources

Installation and Setup

Registering for an Activation Code

Installing and Starting Nessus

Using the terminal, I installed Nessus with the following command:

  • sudo dpkg -i Nessus-10.7.4-ubuntu1404_amd64.deb

After installation, I initiated the Nessus service:

  • sudo systemctl start nessusd.service

Accessing Nessus Essentials

After running the systemctl command shown above, Nessus should start running locally on port 8834.
Navigate to https://localhost:8834/ on your web browser, you may need to click past a security warning.

Basic Network Scan

I selected the Basic Network Scan template to begin assessing the network. This scan type allows for:

    • Customization of targets
    • Scheduling for automated scans
    • Addition of credentials for deeper analysis
    • Advanced settings for performance and safety

Safety Precautions

To prevent potential disruptions:

  • Enabled Safe Checks: This minimizes the risk of crashing fragile applications or services.
  • Adjusted Performance Settings: Configured the scan to slow down upon detecting network congestion.
  • Set Host Responsiveness Checks: Stopped scanning hosts that became unresponsive.

Advanced Scan

With advanced scan options you can perform:

  • Wordlists for Brute Forcing: Added custom wordlists to test for weak passwords.
  • Web Application Tests: Enabled web crawling to discover hidden vulnerabilities.
  • User Enumeration: Performed RID brute forcing for user enumeration.

Credentialed Scan (Most effective)

Credentialed scans offer a deeper level of vulnerability assessment. In the Credentials tab:

  • Windows Credentials: Added options such as password, Kerberos, LM, and NTLM hashes.
  • Database Credentials: Configured credentials for databases like Oracle, PostgreSQL, MySQL, and SQL Server.
  • Plaintext Service Authentication: Enabled authentication for services like FTP, HTTP, IMAP, IPMI, and Telnet.

Addressing Common Issues

  • Firewall Interference

    When scans showed all ports as open or closed due to firewall restrictions, I:

    • Disabled ICMP Pings: In an Advanced Scan, I turned off the “Ping the remote host” option, allowing the scan to proceed without initial ICMP checks.

    Scan Impact Management

    To mitigate potential negative effects:

    • Adjusted Concurrent Checks: Modified the Max Concurrent Checks Per Host to limit resource usage.
    • Avoided DoS Checks: Ensured that Denial of Service plugins were not enabled, as DoS testing was out of scope.
    • Enabled Safe Checks: Reduced the risk of disrupting services during the scan.

Monitoring Network Impact

Used vnstat to monitor real-time network traffic during scans:

sudo vnstat -l -i eth0

This helped in assessing and adjusting the scan’s impact on network resources.

Running the Scan

  • Initiated the scan by clicking the Start button in the Nessus interface. The duration depended on:

    • Depth of the Scan: More thorough scans took longer.
    • Target System Performance: The intentionally vulnerable Windows machine provided ample data for analysis.

Analyzing the Scan

  • Upon completion, the scan revealed:

    • 76 Critical Vulnerabilities
    • 129 High
    • 41 Medium
    • 2 Low
    • 252 Informational

    These elevated numbers were expected due to the target being deliberately vulnerable.

    Vulnerability Management

    • Severity Ranking: Reviewed vulnerabilities sorted by CVSS v3.0 scores.
    • Filtering: Used filters to focus on specific vulnerabilities.
    • Prioritization: Identified critical issues for immediate remediation.

Key Learning and Skills Demonstrated

Vulnerability Assessment: Gained hands-on experience in identifying and analyzing network vulnerabilities.

Tool Proficiency: Developed expertise in configuring and utilizing Nessus for various scanning scenarios.

Security Best Practices: Applied safe scanning techniques to minimize the risk to network resources.

Problem-Solving: Addressed common issues like firewall interference and scan impact management.

Data Analysis: Interpreted scan results to make informed decisions on vulnerability prioritization.

Penetration Testing Writeup: “Active” (Retired Machine from HackTheBox)

Penetration Testing Writeup: “Active” (Retired Machine…

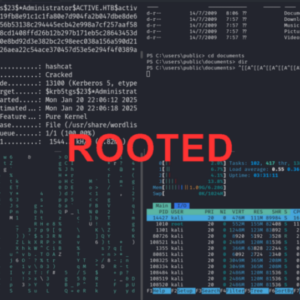
< Penetration Testing Writeup: “Active” (Retired Machine from HackTheBox)> Executive Summary This report summarizes a penetration test conducted against a Windows Active Directory environment. The testing identified critical vulnerabilities including the storage of administrative credentials…

My Methodology for Passing Any Certification in Under 2 Months

My Methodology for Passing Any Certification…

My Methodology for Passing Any Certification in Under 2 Months Hello! I wanted to share my methodology for earning certifications and learning efficiently without sacrificing quality. Over the years, I’ve developed a system that helps…

Cloud Honeypot Setup with Azure Sentinel

Cloud Honeypot Setup with Azure Sentinel

< Step-by-Step Guide: Cloud Honeypot Setup with Azure Sentinel> Introduction In this project, I set up a vulnerable virtual machine (VM) in Microsoft Azure, configured it to log failed Remote Desktop Protocol (RDP) login attempts,…

More Info

Contact me here 👇

Quick Links

© 2024 Created with Royal Elementor Addons